Configure WooCommerce Fusion
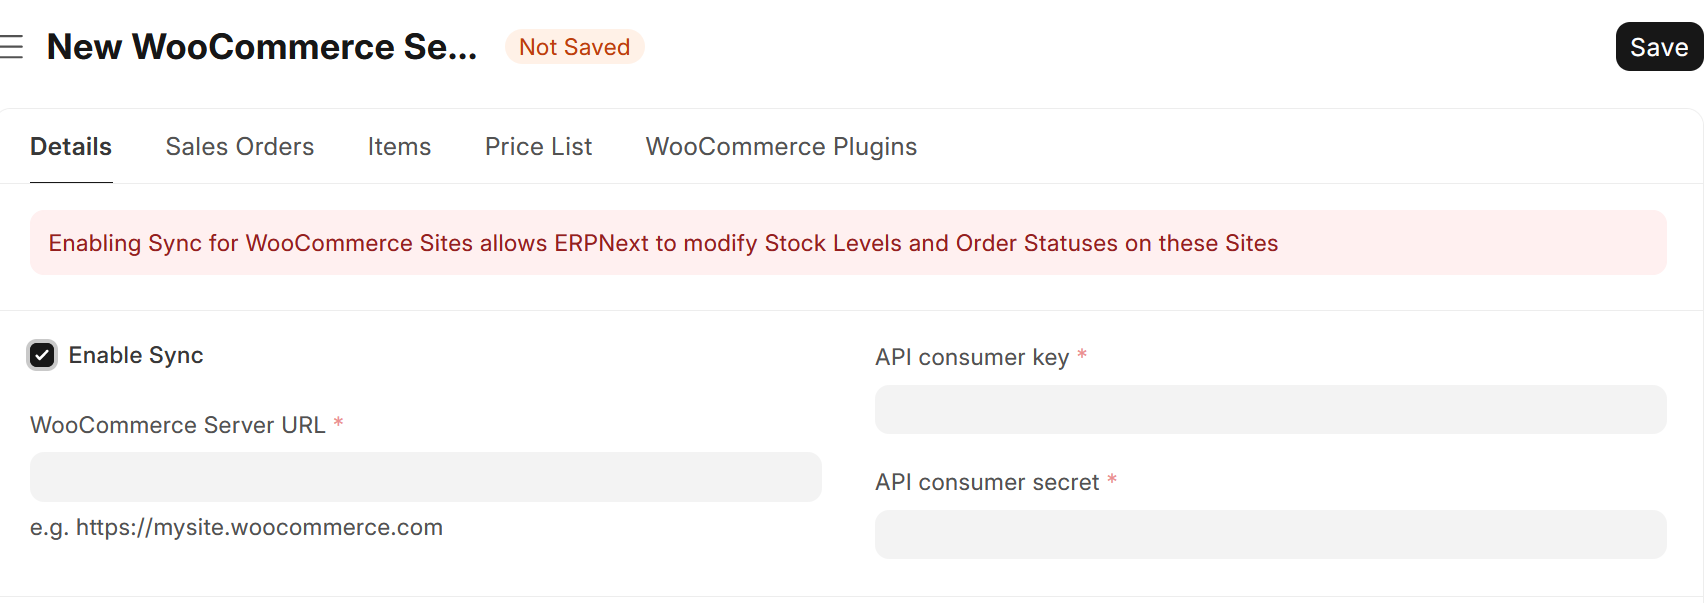
The first step is to create a WooCommerce Server document, representing your WooCommerce website.

Complete the "WooCommerce Server URL", "API consumer key" and "API consumer secret" fields. To find your API consumer key and secret, go to your WordPress admin panel and navigate to WooCommerce > Settings > Advanced > REST API, and click on "Add key". Make sure to add Read/Write permissions to the API key.

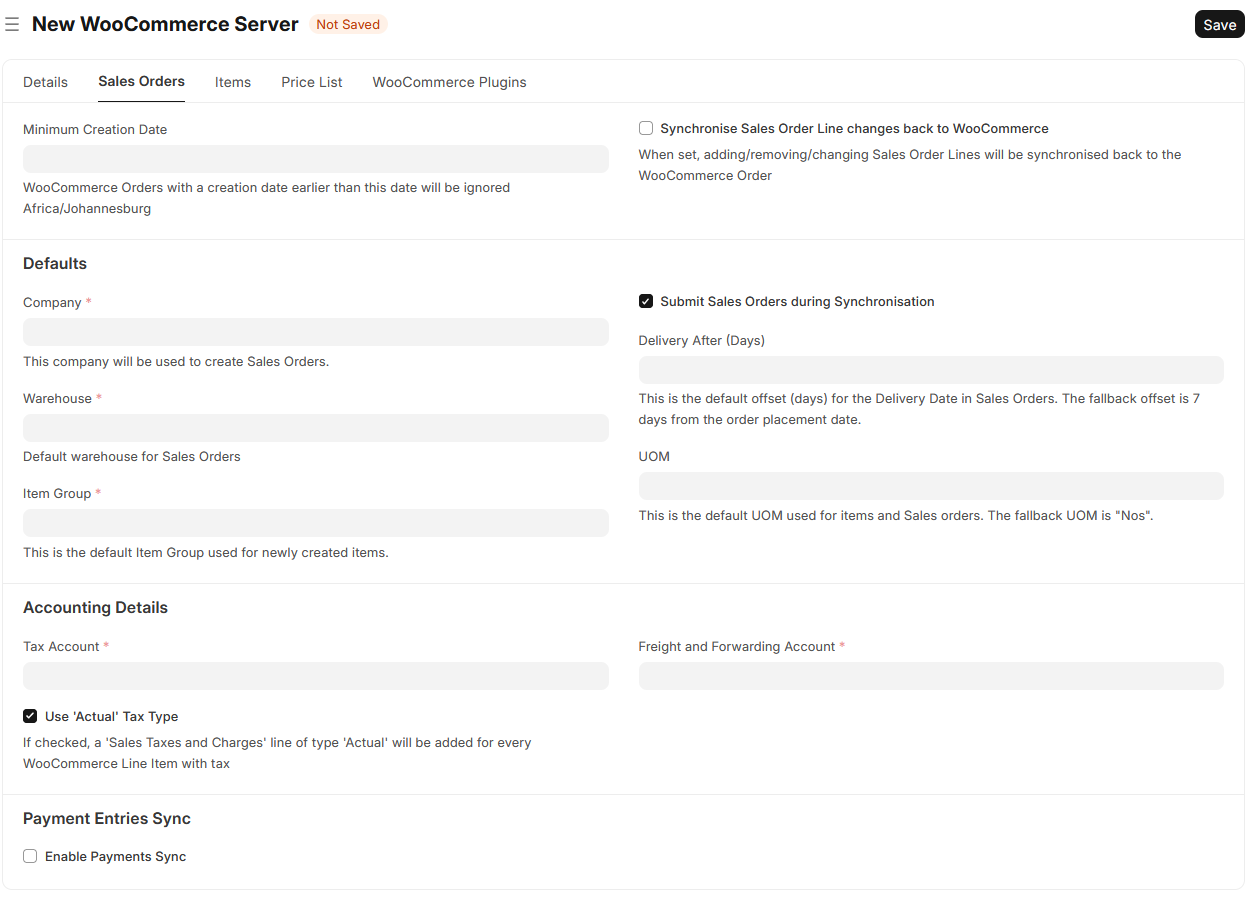
Click on the "Sales Orders" tab and complete the mandatory fields
Settings:
- Synchronise Sales Order Line changes back
When set, adding/removing/changing Sales Order Lines will be synchronised back to the WooCommerce Order (Note: Sales Orders will always be synchronised, this setting is for sync'ing changed Sales Order Lines back to WooCommerce)
- Enable Payments Sync
Let the app create Payment Entries for paid Sales Orders. A mapping of Payment Method to Bank Account is required:
A Payment Entry will only be created if the following conditions are true:
WooCommerce Order>Payment Methodis set andWooCommerce Order>Date Paidis set (unlessIgnore empty 'Date Paid' field on WooCommerce Ordersis set onWooCommerce Server
*When the payment method is "Cash on Delivery" (cod), the Date Paid field would usually be blank, so creation of a Payment Entry won't happen. If you want to be sure, you can add cod in the mapping:
{
   "bacs": "1000-000 Bank Account",
   "cheque": "1000-100 Other Bank Account",
   "cod": ""
}
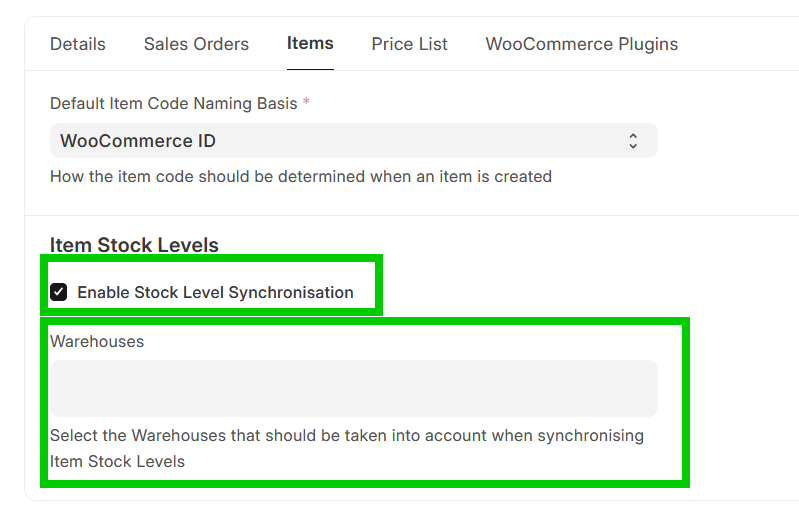
Click on the "Items" tab if you want to turn on Stock Level Synchronisation
Settings:
- Default Item Code Naming Basis
- How the item code should be determined when an item is created, either "WooCommerce ID" or "Product SKU".
- Enable Stock Level Synchronisation
- Turns on Syncrhonisation of Item Stock Levels to WooCommerce
- Warehouses
- Select the Warehouses that should be taken into account when synchronising Item Stock Levels
Click on the "Save" - and you are ready to go!